
If you’re working on a demo for your game, you probably have some content that you don’t want to package into your demo build. At the same time, it would be nice if you could just work in the same Unreal project for your demo. You might even have a CICD pipeline that automatically builds your game and uploads it to a Steam depot. This guide will show you how a simple addition to a config file can be enough to exclude base game content from your demo. And we’ll also have a look at packaging DLC content, because why not.
What Does the Engine Package?
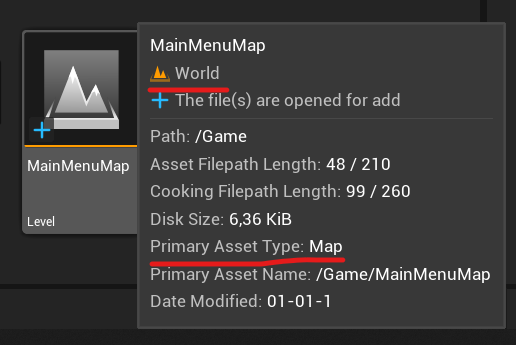
As you work on your game, Unreal builds a tree of asset dependencies. For each asset, it tracks which other assets are needed in order for it to work. For instance, your map needs a game mode class, the game mode needs a character class, and the character needs a skeletal mesh, textures, and animations. Unreal can automatically gather all this information for us, as long as we tell it the root(s) of the tree. These roots are known as the Primary Assets. The engine comes with a few predefined primary asset classes, most notable of which is the Map.
The default behavior of the engine is to take the Game Default Map , the one you set in the Maps & Modes section of the project settings, and use that as the only Primary Asset. From there, all dependencies of that one map are pulled in during the cook. For most simple projects, this is just fine. Your map may contain a portal actor, and that portal actor contains a reference to the next map. As long as you use Open Level (by Object Reference), rather than Open Level (by Name), there is a soft object pointer to the next world somewhere.
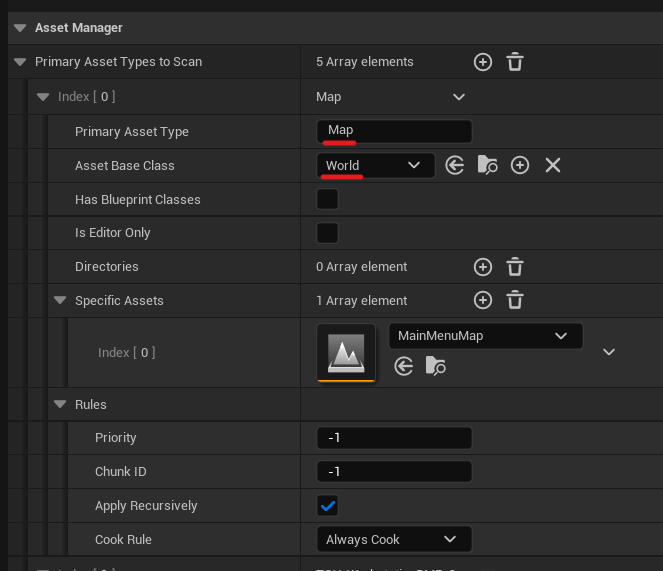
For more complex projects though, you might want to add more primary assets. You can do this in the project settings. The Asset Manager section has an array called Primary Asset Types to Scan.
Specifying What to Include
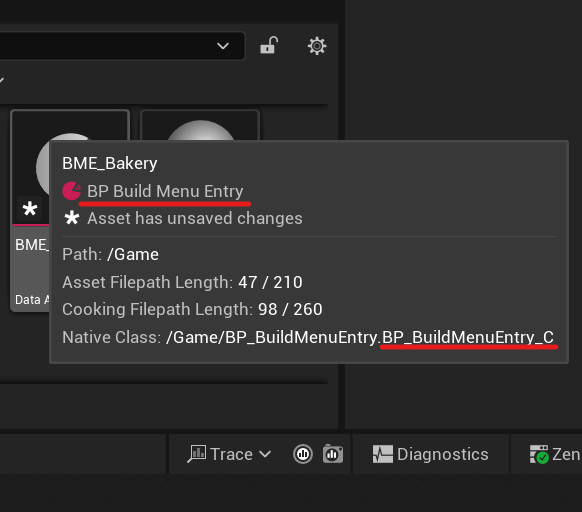
This list of Primary Asset Types to Scan defines all roots of the dependency tree. Any Primary Asset type can be listed here, along with a directory to scan for the assets, and/or a list of specific assets to package. You can hover over an asset in the asset browser to see if it counts as a Primary Asset. This is where you can find the base class and the Primary Asset Type you should use.
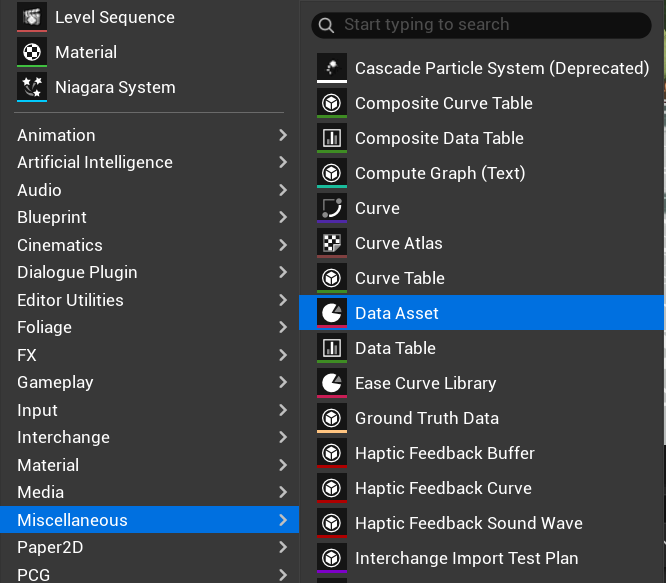
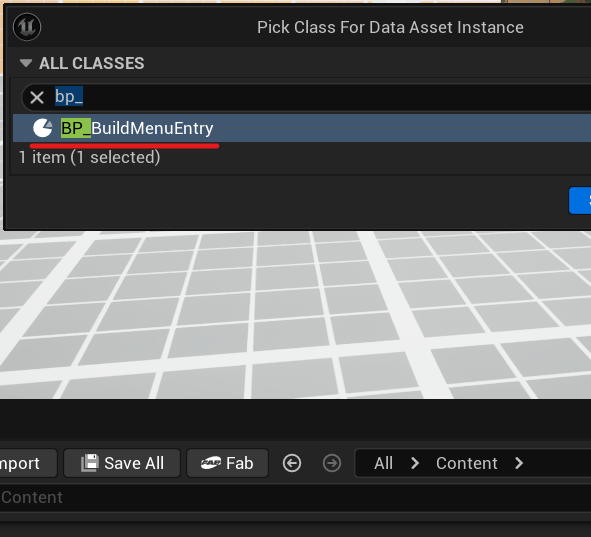
You can make your own Primary Asset classes, but there are already some primary asset classes provided by the engine. Aside from the Map, there is also the PrimaryAssetLabel. This is an asset that scans the folder it is in, and applies its cook rules to all those assets. This is an easy way to include many assets of different types. You can create a PrimaryAssetLabel from the context menu, by going to Miscellaneous > Data Assets, and choosing PrimaryAssetLabel. Don’t forget to add those PrimaryAssetLabels to the asset manager though, just creating the asset is not enough.
Using Blueprints as Primary Assets
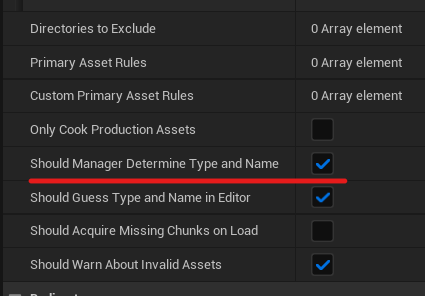
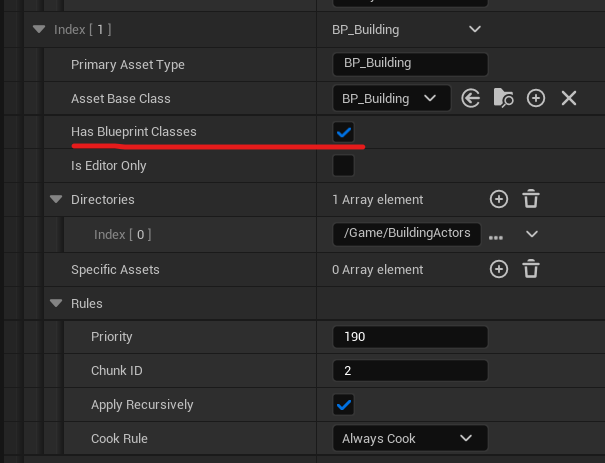
The hover trick only works for asset instances, not for blueprints. But you can still add a blueprint parent class as a primary asset. Just use the class name as the primary asset type, and check Has Blueprint Classes. This method does require you to enable the Should Manager Determine Type and Name setting, which you can find lower in the asset manager settings. If you forget to turn this on, you will see this error during packaging:
Registered PrimaryAssetId … for asset … does not match object's real id of ! This will not load properly at runtime!There’s a weird thing to keep in mind: if your blueprints aren’t direct children of the primary asset you register, all intermediate parents have to be data-only blueprints (aka they can’t contain blueprint code). The child classes you want to package can contain blueprint code just fine.
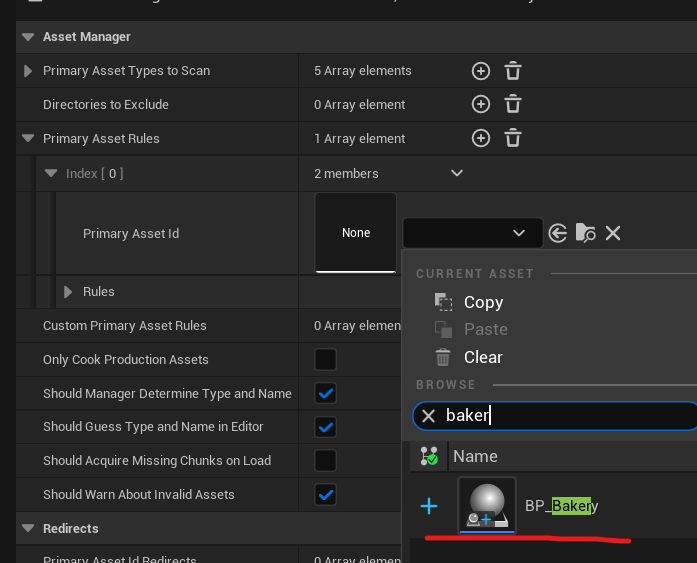
One way to test if you entered everything correctly is to temporarily add an entry to the Primary Asset Rules (another array lower in the settings). There you can select a Primary Asset ID, but the picker will only show you assets that were discovered by the Primary Asset Types To Scan array. If your asset type doesn’t show up, it means something’s wrong with your scan settings.
Making Your Own Primary Data Asset
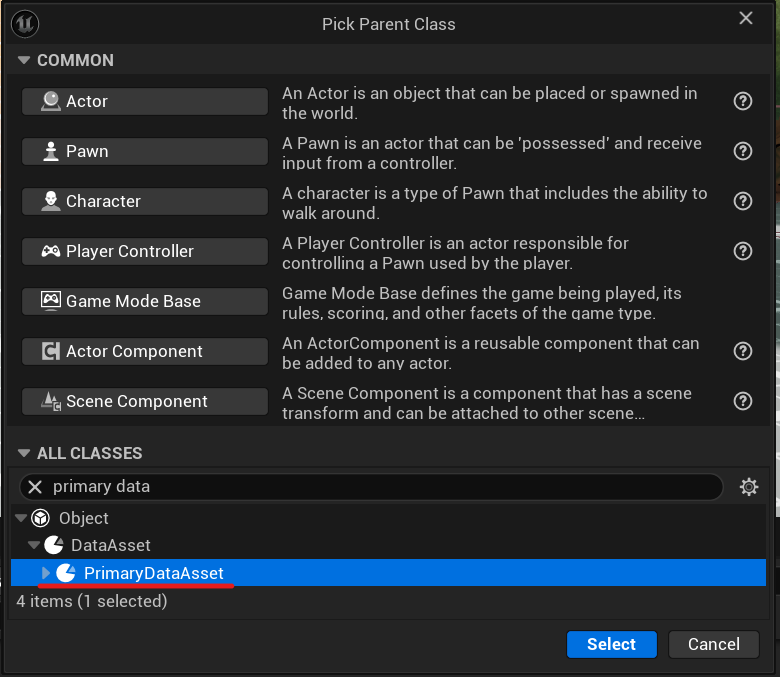
If maps aren’t a logical way to separate content for your game, you might want to make your own Primary Asset type. Perhaps you make one for every building you can build in a city builder, or every hero you can play in a MOBA, etc. The easiest way to do this is with a PrimaryDataAsset class.
You can create a new blueprint that inherits from PrimaryDataAsset. In this blueprint you can add the fields (variables) each asset has to specify. After that, you can make an instance of that blueprint from the context menu, by going to Miscellaneous > Data Asset, and selecting the type you just created. You can once again use the hover trick on the data asset instance to see its Primary Asset type. In fact, if you create a PrimaryDataAsset class in blueprints, the engine will throw a “_C” at the end of the asset type to confuse you. Making a PrimaryDataAsset this way does not require the Has Blueprint Classes, or the Should Manager Determine Type and Name.
If you make a PrimaryDataAsset class in C++…
the hover box will literally show you a Primary Asset Type field (like the Map). For blueprint inherited classes you should use the Native Class instead. If you combined these two (a class in C++, and another child class in BP), the hover box will correctly show the Primary Asset Type, which has a “_C” at the end.
How To Exclude Assets
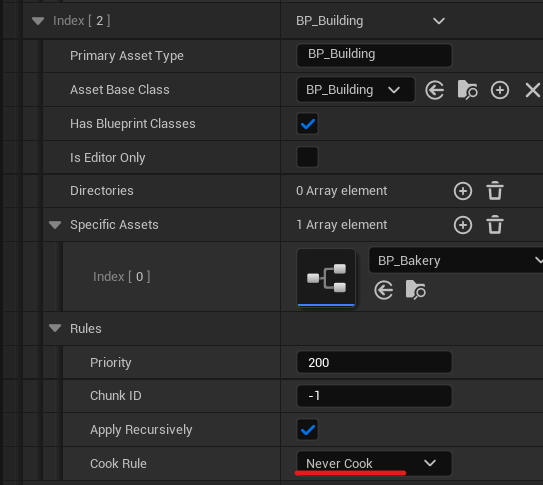
In the Primary Asset Types To Scan array, each entry has a section called Rules. Here you can tell the engine whether the specified asset(s) should always cook, or to only cook when referenced (i.e. unknown), or to never cook. When you choose to never cook a list of assets (or a directory of assets), you probably want to set the priority of that cooking rule higher than any of the other rules, so that it doesn’t get… overruled 🥁… 🦗🦗🦗
There is another less organized way…
The project settings have more ways to include/exclude content from a cook. Under Packaging, there are the List of maps to include in a packaged build, Additional Asset Directories to Cook and Directories to Never Cook arrays. I prefer not to use them so that all the details of our cooking process can easily be found together in the same place.
Another way I read about is the Untracked meta specifier, which prevents the object owning the property from pulling the reference in during cooking. It works for TSoftObjectPtr, TSoftClassPtr, and FSoftObjectPath, but not if they are inside an array. An easy workaround is to use a wrapper struct with the property (and the specifier), and to use that struct in the array. This is only possible on the C++ side though. From my experiments, the engine does seem to retain its ability to update the referenced asset after a rename or move operation, but it won’t show the asset in the reference viewer.
After adding these cook exception to the asset manager settings, your source control will show a change in the DefaultGame.ini file. This means that for a demo build, all you have to do is inject these lines of text into the DefaultGame.ini before you package to exclude the content. In our case, we have a separate DemoGame.ini file that includes everything we want our CICD to inject before packaging a demo build. If you don’t have a CICD, you can manually copy and paste the insert before packaging the demo.
After you excluded assets, give it a test spin by packaging the game. You might run into packaging errors like:
UATHelper: Error: Packaging (Windows): LogCook: Error: Content is missing from cook. Source package referenced an object in target package but the target package was marked NeverCook or is not cookable for the target platform.
UATHelper: Error: Packaging (Windows): Source package: /Game/Quests/BP_BuildBakeryQuest
UATHelper: Error: Packaging (Windows): Target package: /Game/BuildingActors/BP_Bakery
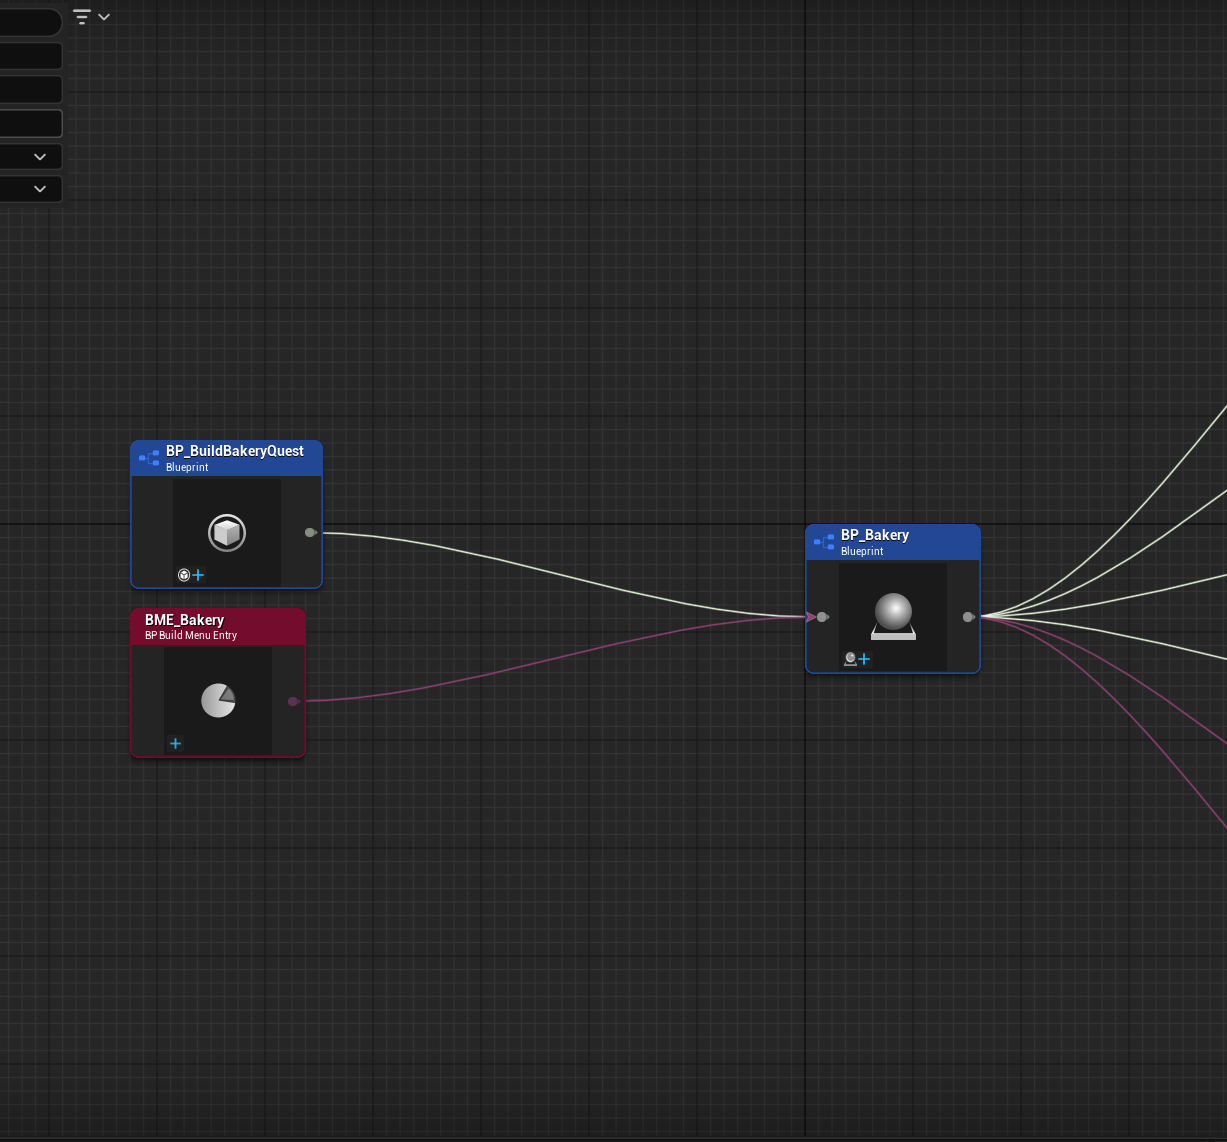
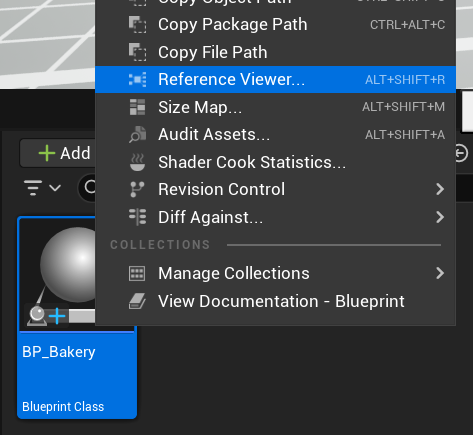
UATHelper: Error: Packaging (Windows): Referenced object: /Game/BuildingActors/BP_Bakery.BP_Bakery_CThis basically means that there are still assets in the cook with a hard reference to the assets you excluded. So how do we fix that? Find the target package in the asset browser (in this case, it is BP_Bakery) and open it with the Reference Viewer.
The Tree of Asset Dependencies
The Reference Viewer is how you can see the tree of dependencies that Unreal has constructed for you.

This tool shows all dependencies of the asset you selected. White lines are hard references, pink lines are soft references. The difference between these two is also of big importance to runtime asset loading, but let’s stick to the packaging process for now (I already discussed soft pointers here). During cooking, both hard and soft references are used to automatically determine an asset’s dependencies. These dependencies are also pulled into the cook, and end up in the packaged game. The difference between the two though, is that for soft references it’s acceptable if the dependency is excluded from the cook, whereas hard references throw the aforementioned error. When you’re loading an asset from a soft reference at runtime that turns out not to be in the pak, it will simply return a nullptr (so you should always be handling that edge case).
The Reference Viewer is the place to be if you want to track down all remaining hard references to your non-demo content. Sometimes you’ll see a reference here that you just can’t find anywhere in the blueprint. This could be an outdated reference cache. You can easily fix this by compiling and saving the blueprint, and then refreshing the Reference Viewer to see if the dependency has disappeared. If not, just do a search through the blueprint with the target asset name. Remember that casting to a blueprint class is also considered a reference, so if that’s what’s causing the dependency, either cast to a parent base class, or to an interface where possible. It’s also possible that there are hard references to your class, but only from assets that are also excluded from the cook. These shouldn’t be a problem.
Chunks & DLC
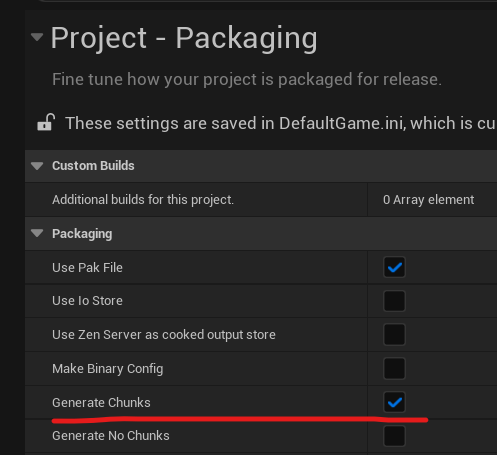
The easy thing about a demo build is that it completely replaces the artifacts you upload to Steam. You just package the game a little differently, and upload the result to another depot. For DLC though, it is more common to add some additional files to the existing installation. This method requires us to separate the files of our base game from the files of our DLC. The engine already has a feature for this, known as chunking. Chunking has extensive documentation, so I will keep it brief. To use this feature, enable GenerateChunks in the project settings (as well as UsePakFile, but that should already be on).
When we go back to the asset manager settings, the cook rules of the Primary Asset Types To Scan array has another value that we haven’t discussed: Chunk ID. If you can single out the Primary Assets that make up your DLC, you can assign them to a (higher than 0) chunk ID. If you set the priority of the base game chunks to be higher than those of the DLC, the asset dependencies they both rely on will go into the base game chunks (by default that is chunk 0), and the DLC chunks will only contain the assets that make up the DLC. If you manage to do this right, you can simply remove the pak files that belong to the DLC before uploading the folder to your Steam depot. As long as there are no hard references to the DLC assets (and you handled your nullptrs when loading any soft pointers), the game will run just fine without the DLC chunks. You can then use the removed pak files as the DLC content (make sure they make their way back into the same /Content/Paks folder by maintaining the same folder structure).
However, it might require some effort to get this to work right. If the base game chunks pull in DLC content during cooking (even if those dependencies are soft references), those chunks will abuse their higher priority to snatch those assets before the DLC chunks even have an opportunity to protest. This chunking method requires you to be very strict about which assets end up in which chunk. Simply telling the Primary Assets which chunk to use might not be enough, especially if your base game directly references those Primary Assets in code. Three approaches you can take:
- Remove all references in the base game to the DLC content, and rely on the Asset Manager to return a list of all Primary Assets it could find at runtime.
- Use a lot of cook rules/primary asset labels/debugging to get the content to go into the correct chunks.
- Override the asset manager and do some custom magic there.
Keep in mind that you’ll always need to package the DLC content when packaging your game. You can separate the base game paks from DLC paks afterwards. The base game needs to know which paks exist. If you add a random pak to a game installation, it won’t know what to do with it. The packaging process has given the game a specific list of pak files to search for and load.
Oh, and when you change your chunking settings, keep in mind that chunk paks will just remain in your build folder unless you overwrite the file with a chunk of the same name or manually delete it. I recommend just deleting the entire build folder before testing new chunk settings.
What Chunk Will this Asset Be In?
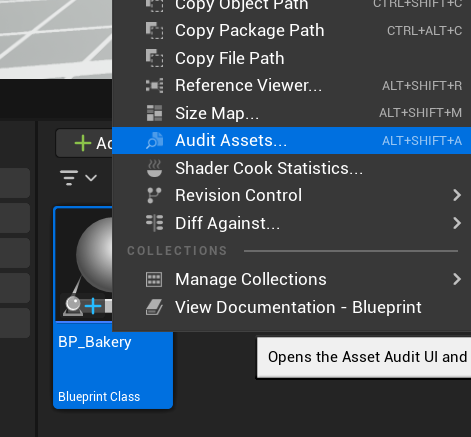
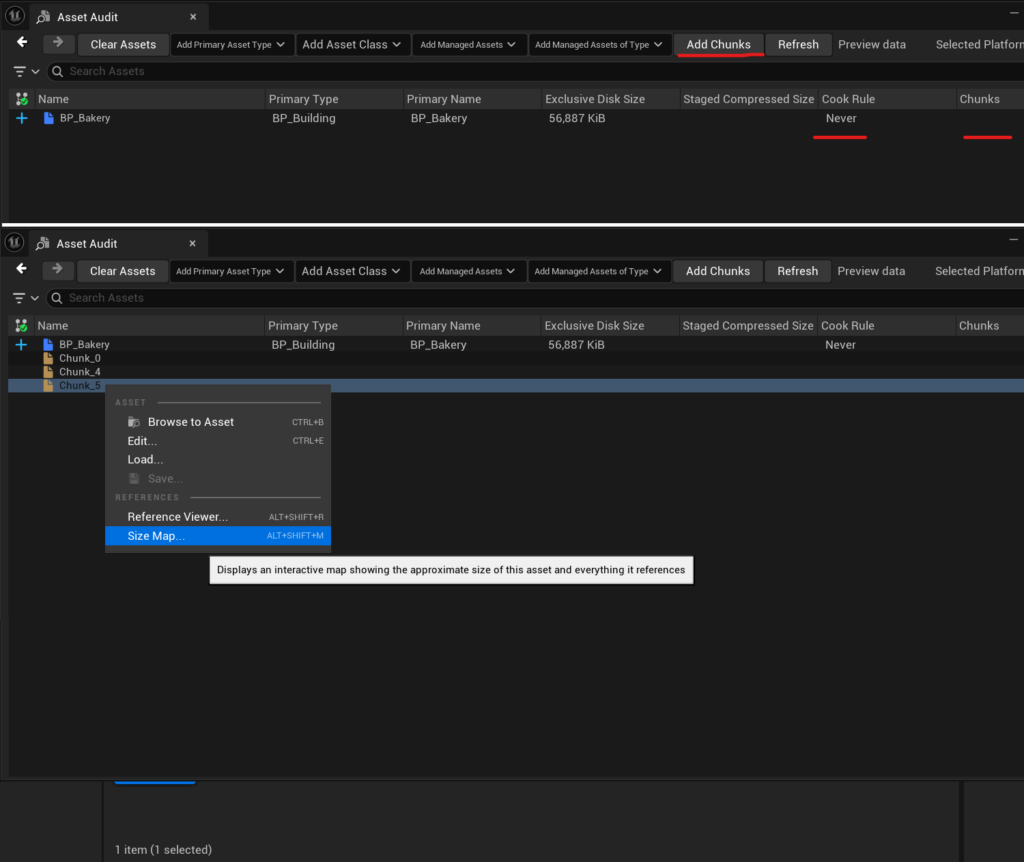
If you want to check which chunk a specific asset is being claimed by, you can open it with the Asset Audit tool. Here you can see the chunk(s) that depend on this asset, and the cook rule that ended up being applied. You can also use this window to inspect the chunks themselves by clicking Add Chunks. This way you’ll see which chunks exist, but you can also use this to open an entire chunk with the Size Map tool.
Checking what’s actually inside a chunk
The Unreal installation comes with more than just the editor. One of the many nifty programs it includes is called UnrealPak.exe. It’s a command line tool that lets you investigate (or even extract) pak files. If you want to see in full detail which assets were included in a pak file, follow these steps.
- Add UnrealPak.exe to your Windows PATH
- From the Windows start menu, open Edit the system environment variables
- In the pop-up, click the Environment variables… button
- From the System Variables box select the
pathvariable and click Edit - A window pops up, click New
- Enter the path to the directory of the UnrealPak.exe file (for me, this is C:\Program Files\Epic Games\UE_5.7\Engine\Binaries\Win64)
- Click Ok on all open windows
- Open (or restart) PowerShell or Bash from the folder with the paks (for me this is …/Build/Windows/GameName/Content/Paks)
- Type
UnrealPak.exe pak_name -List > chunkinfo.txt- Where
pak_nameis the filename of the pak you want to view -Listasks the program to list all files in the pak> chunkinfo.txtwrites the output of the command to a file of that name
- Where
- Go through the new file chunkinfo.txt and Ctrl+F the files you’re looking for
- If you run UnrealPak.exe without any arguments, it will give you a list of everything it can do
For some reason, chunk 0 never works with this tool, no idea why. Also, if you encrypt your pak files you might need to either tell UnrealPak.exe the decryption key, or temporarily disable pak encryption.
Another way to see what has been packaged is to go into the /Saved/Cooked/<Platform>/<GameName>/ folder. Only assets that were cooked during your last package will be visible here. It doesn’t give any info about which chunk it ended up in, but you can combine these techniques to figure out which assets are in chunk 0 through the process of elimination.
Our Setup
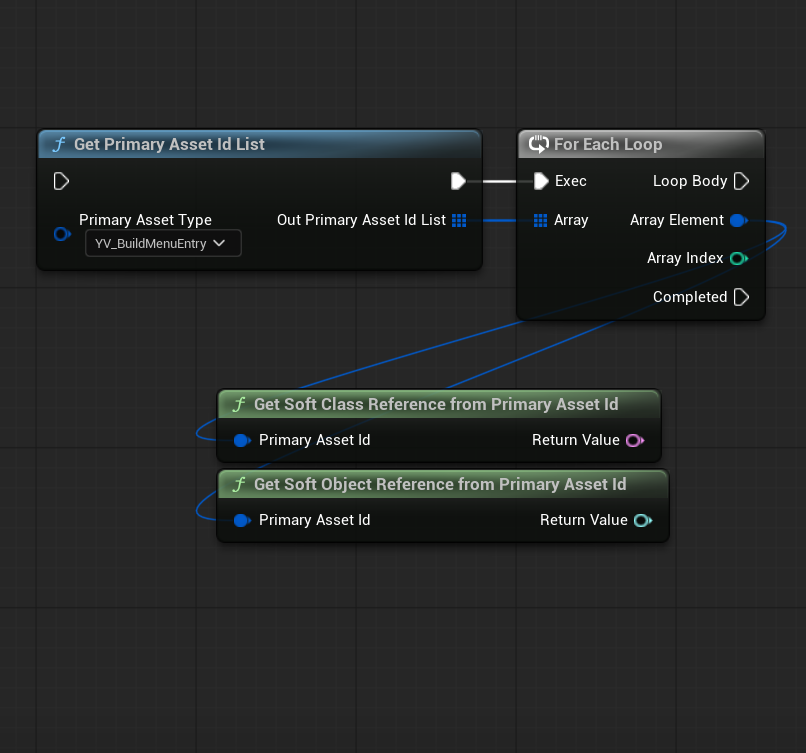
For our city builder, we have created a PrimaryDataAsset class called BuildMenuEntry, which represents an option the player can choose from the build menu (building/road/decoration). It contains all meta data required for the build menu, as well as a soft class pointer to an actor class. At game startup, we ask the Asset Manager which BuildMenuEntries it can find. We have a C++ subsystem that obscures this process and checks which buildings are unlocked to the player, but you can also use BP code to find all Primary Assets like this.
FAssetRegistryModule& AssetRegistryModule = FModuleManager::LoadModuleChecked<FAssetRegistryModule>("AssetRegistry");
TArray<FAssetData> AssetData;
FTopLevelAssetPath classPath = FTopLevelAssetPath(UYV_BuildMenuEntry::StaticClass());
AssetRegistryModule.Get().GetAssetsByClass(classPath, AssetData, true);

buildMenuEntries.Reserve(AssetData.Num());
for (const FAssetData& asset : AssetData)
{
	TSoftObjectPtr<UYV_BuildMenuEntry> softBuildMenuEntry = TSoftObjectPtr<UYV_BuildMenuEntry>(asset.ToSoftObjectPath());
	if (softBuildMenuEntry.IsNull())
	{
		// guard
	}
	buildMenuEntries.Add(softBuildMenuEntry);
}
Because we prepared for mod support, our content is very asset centric. The BuildMenuEntry asset contains the data about whether it should be shown in the build menu, under what categories, and with what sort priority. There is no array or datatable that lists all the buildings we want to see in the build menu. This way, even a modder could create a BuildMenuEntry, add it to the game, and it shows up automatically (see this talk by Matt Stafford from mod.io to see how that would work).
Our demo actually contains the same BuildMenuEntries as the base game, since we do want all buildings to be shown in the build menu. The difference is that some buildings are never unlocked through gameplay, and we excluded the actors of those building with a NeverCook rule to prevent piracy.
We have a CICD setup that builds our code and uploads it to Steam, with a separate Git branch for the demo. Before it packages the demo build, it injects some text into the DefaultGame.ini similar to this:
[/Script/MyGame.MyGameDeveloperSettings]
bIsDemoBuild=true
[/Script/Engine.AssetManagerSettings]
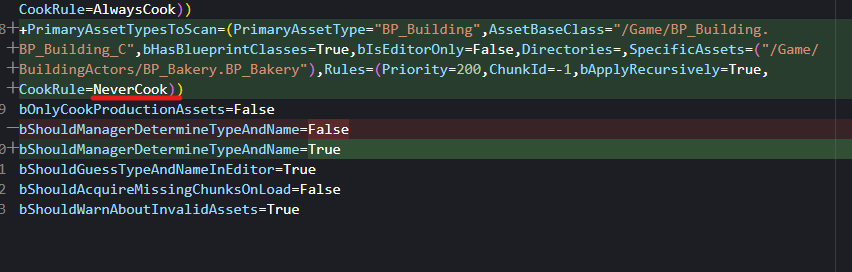
+PrimaryAssetTypesToScan=(PrimaryAssetType="BP_Building",AssetBaseClass="/Game/BP_Building.BP_Building_C",bHasBlueprintClasses=True,bIsEditorOnly=False,Directories=,SpecificAssets=("/Game/BuildingActors/BP_Bakery.BP_Bakery"),Rules=(Priority=200,ChunkId=-1,bApplyRecursively=True,CookRule=NeverCook))
bShouldManagerDetermineTypeAndName=TrueThe injected settings also set a boolean bIsDemoBuild setting that we can use in blueprints for game logic. We inherited a C++ class from UDeveloperSettings for our own project settings, but any BP class with a config variable should work. You could potentially do everything with only this boolean. That’s a way simpler solution, but it doesn’t reduce the demo game folder size, and it’s very easily hackable. In my previous game, all we did was ask the Steam API if the base game was installed in the player’s library, and based everything off of that. However, that meant that if you had the base game installed, you were no longer able to play (or test) the demo build.
Our DLC content will be separated into chunks that contain additional build menu entries, along with their dependencies. We also have a ResearchTreeEntry asset type, which references one or more build menu entries. To prevent the research tree from pulling all the build menu entries into chunk 0, the ResearchTreeEntry uses the Untracked specifier (and a wrapper struct) to stop the dependency chain. This way, the base game can have a higher chunk priority without pulling in the DLC content.
/**
 * An untracked pointer to a primary data asset. The owner of this property will not pull the
 * primary data asset into its chunk during cooking.
*/
USTRUCT(BlueprintType)
struct FYV_SoftPrimaryDataAssetPtr
{
	GENERATED_BODY()

	UPROPERTY(EditAnywhere, BlueprintReadWrite, meta = (Untracked))
	TSoftObjectPtr<UPrimaryDataAsset> asset;

};
Conclusion
Working towards a demo or a DLC is a perfect way to discover how you’ve been shooting yourself in the foot with all those asset references. You will forever understand why you see people using interfaces, GetComponentByClass, or gameplay tags. You will understand why some people leave the skeletal mesh slot empty in their NPC parent class, or why programmers can be so strict about what belongs to a C++ module, and what doesn’t. And you’ll finally understand what people mean when they call code “spaghetti”. Please keep your references in an acyclic tree structure as much as you can. Be nice to your future self 🧡
Pingback:Importing CSV Data with Python – Rooibos Games